
Control line Page
I have been involved in control line model flying for as long as I can remember. I have always found that it is a very interesting and satisfying way of flying model aeroplanes. If it was merely a matter of taking off, flying around in circles, and landing, it would obviously be downright boring after the initial learning was over. My particular interest is in C/L stunt, or aerobatics, and the challenge of trying to perfect the schedule of the intricate manoeuvres, is never-ending. It takes years of practice and a really good model design to do well in the sport. The level flying height, and also the bottoms of all manoeuvres, is only 1.5 metres (5ft.) so as you can imagine, it takes good co-ordination and reflexes to get this right and consistent.
There are four categories for C/L competition and these are stunt, team racing, combat, and speed. The extra event that is not part of the normal FAI competitions is scale. There are plenty of websites with info on all of these, and you will find some of these on my “Links” page.
Control line Pattern Simulation
In 2004, I did a lot of judges training and created a 3-D interactive simulation of the F2B stunt pattern using Blender 3D software. By today's standard the graphics are really outdated but it is still worth using to observe the shapes of the stunt maneuvers from any angle. The links to download the small program and instruction manual are below. They are zip files so please right click on each of these selection blocks and then click on “Save target as” and save to a folder of your choice then unzip them.
My Designs
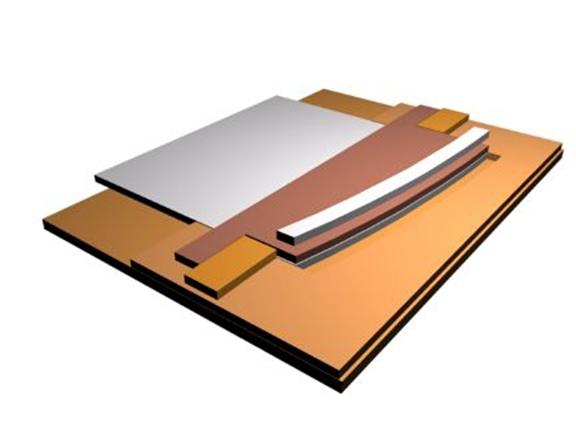
I have always enjoyed sharing the sport with as many people as possible, and I have designed quite a few stunt trainers as well. In my never-ending search for a simple trainer that is cheap make and easy to repair, but still flies well. I came up with a new series that I call “Eze”, pronounced “Easy.” The design is based on the popular Russian combat wing design that uses a paper-covered foam-core leading edge, simple ribs that is easy to get straight. This wing design is also very tough as well. You can cover it with clear Mylar, or your favourite iron-on plastic covering. Here are a few pictures of the 3 different Eze’s that I have built for .15, .25/.30, and also .40 glow engines. The engines used in these models are, MVVS .15, Enya .30SS and Enya .40SS.

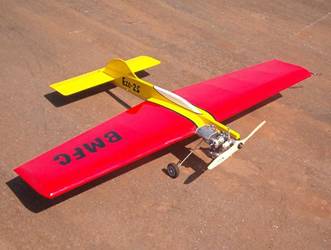

At the present time, I do not have the time to do a complete construction article. The basic idea is to understand how to make combat wings. Half of the fuselage is made from cheap hardwood like pine. I used some roof truss wood for mine and added hard wood (Beech, Maple etc.) for the engine bearers. I have done some plans in PDF format that will give you most of the important parts in full-size. You can print the pages on a standard A4 printer and then join them up. Here is the link to download the plans> Eze 25 plan
Eze-Pro #1
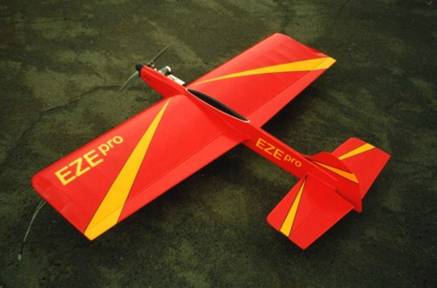
I have now added the full size plan for my Eze-Pro design that has flaps. This is one of me all-time best designs, and many have been built and flown with great success. The plan is pdf format and the size is A0. These days it is no problem for most print shops to print this for you with the large format printers. Here is the link to download the plans> Eze-Pro plan
A simple way to make ribs for these wings, is shown below. The ribs, or rib-lets are simple to cut with the method shown below. This system uses much less balsa wood than making full ribs, and of course with the price of balsa wood these days, this is a good idea.
Have a look at this and the plans and please feel free to contact me if you need any more info.
Cutting Ribs for the Eze C/L stunters
Step 1:
Make the parts out of 3 mm wood, like Masonite (hardboard) etc. as per drawing 1. I’ve made the colour of the separate template darker to show the difference. Glue the lighter colour pieces together. The shape of the cutting edge of the darker template and the lower inner template, must match the rib that you are cutting.
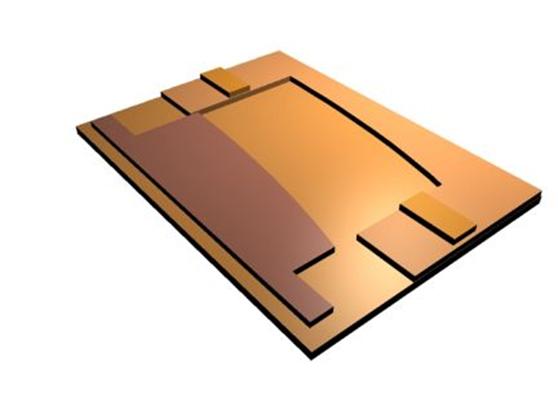
Drawing 1
Cut a piece of 1/8” (3 mm) balsa across the sheet (grain parallel) so that the width is the same as the rib. Put the cutting template on the sheet as in Drawing 2, and slice off the balsa. Now, push the balsa into the lower template (Drawing 3), and place the cutting template over it, as in Drawing 4. Next cut the rib and remove out of the balsa as in Drawing 5.
Now just repeat the process until you have all the ribs. To make the shorter ribs as you get closer to the wing tips, you cut of the end closest to the trailing edge. To save balsa wood, I make the batches of shorter ribs from a shorter length of wood, and simply push it up against the left hand side of the template. This method saves plenty of balsa wood.

Drawing 2

Drawing 3
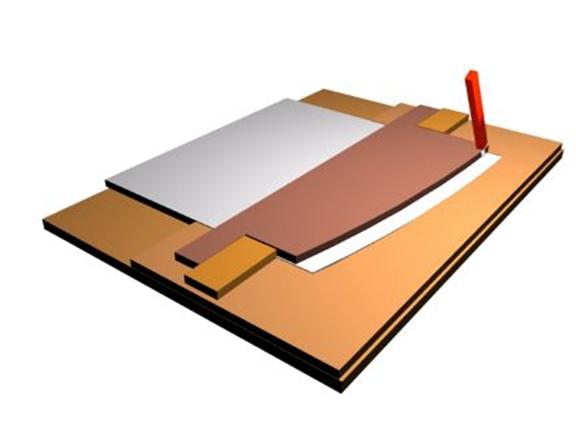
Drawing 4
Drawing 5